Shortcuts
Default keyboard shortcuts
When CODESYS Development System is first installed, the following key combinations are set by default.
Tip
You can customize the default shortcuts to fit your personal requirements.
The default keyboard shortcuts are available in the Tools → Customize menu, on the Keyboard tab. You can assign a keyboard shortcut to any of the commands listed there, or remove it or change it.
For more information, see: Customizing Keyboard Shortcuts.
Icon | Commands | Shortcut | Description |
|---|---|---|---|
Category View | Menu: View | ||
| Devices | Alt + 0 | Opens the Devices view |
| Full Screen | Ctrl + Shift + F12 | The Full Screen command toggles between full-screen mode and window mode |
| POUs | Alt + 1 | Opens the POUs view |
| Modules | Alt + 2 | Opens the Modules view |
| Messages | Alt + 3 | Opens the Messages view |


Category CFC | Menu: CFC | ||
Select All | Ctrl + Shift + A | Selects everything in the CFC editor | |
| Reset Pins | Ctrl + U | Resets the pins of a box |
Insert Output | Ctrl + A | New output | |
Insert Box | Ctrl + Shift + B | New box | |
Insert box from input assistant | Ctrl + B | Opens the Input Assistant | |
Insert box with EN/ENO from input assistant | Ctrl + Shift + E | Opens the Input Assistant | |
Insert Input | Ctrl + Q | ||
| Negate | Ctrl + N | |
Insert Jump | Ctrl + L | ||
Switch S/R/Ref/None | Ctrl + M |


Category File | Menu: File | ||
Exit | Alt + F4 | Exits CODESYS Development System | |
| New Project | Ctrl + N | |
| Open Project | Ctrl + O | |
| Save Project | Ctrl + S |


Category FBD/LD | Menu: FBD/LD | ||
| Delete IL line | Ctrl + Del | |
| Edge Detection | Ctrl + E | Before the selected box input or output |
| Insert Box | Ctrl + B | In the selected network at the end |
| Insert Box with EN/ENO | Ctrl + Shift + E | |
| Insert Branch | Ctrl + Shift + V | At the selected line |
| Insert Coil | Ctrl + A | |
| Insert Contact | Ctrl + K | |
| Insert Contact (right) | Ctrl + D | |
| Insert Contact Parallel (above) | Ctrl + P | |
| Insert Contact Parallel (below) | Ctrl + R | |
| Insert Assignment | Ctrl + A | |
| Insert Edge Detection | Ctrl + E | |
| Insert Empty Box | Ctrl + Shift + B | |
| Insert Network | Ctrl + I | |
| Insert Network (Below) | Ctrl + T | |
| Insert Input | Ctrl + Q | |
| Insert Jump | Ctrl + L | |
| Negation | Ctrl + N | |
Paste above | Ctrl + H | ||
Paste below | Ctrl + F | ||
Paste right (after) | Ctrl + G | ||
| Set Output Connection | Ctrl + W | |
| Set/Reset | Ctrl + M | |
| Toggle Network Comment State | Ctrl + O | |
| Update Parameters | Ctrl + U | |
View as function block diagram | Ctrl + 1 | ||
View as instruction list | Ctrl + 3 | ||
View as Ladder Logic | Ctrl + 2 |


Category Declaration | Menu: Declaration | ||
| Insert | Ins |

Category Window | Menu: Window | ||
Close Editor | Ctrl + F4 | ||
Previous Editor | Ctrl + Shift + F6 | ||
Next Editor | Ctrl + F6 | ||
Previous Pane | Shift + F6 | ||
Next Pane | F6 | ||
Toggle First Pane | Alt + F6 |
Category Breakpoints | Menu: Debug | ||
Toggle Breakpoint | F9 | ||
| Step Into | F8 | |
| Step Out | Shift + F10 | |
| Step Over | F10 |


Category Help | |||
| Contents | Ctrl + Shift + F1 |

Category SmartCoding | |||
| Input Assistant | F2 | |
Auto Declare | Shift + F2 |

Category Ladder (LD2) | Menu: Ladder | ||
| Outcommented | Ctrl + O | |
| Insert Box | Ctrl + B | |
Switch Edge Detection | Ctrl + E | ||
| Insert Contact | Ctrl + K | |
| Insert Coil | Ctrl + A | |
| Insert Input | Ctrl + Shift + I | |
| Insert Output | Ctrl + Shift + O | |
| Insert ST Block | Ctrl + Shift + S | |
| Negate | Ctrl + N | |
| Insert Network | Ctrl + I | |
Switch Set/Reset Modifier | Ctrl + M | ||
| Insert Jump | Ctrl + L | |
| Insert Return | Ctrl + R | |
| EN | Ctrl + Shift + E | Adds or removes an EN input |
| ENQ | Ctrl + Shift + N | Adds an EN0 input |
| Open Parallel Branch | Ctrl + P | |
| Close Parallel Branch | Ctrl + Shift + P |


Category Bookmarks | Menu: Edit → Bookmarks | ||
| Next Bookmark (Active Editor) | F12 | |
| Previous Bookmark (Active Editor) | Shift + F12 | |
| Toggle Bookmark | Ctrl + F12 |


Category: "Message View" | |||
Next Message | F4 | ||
Previous Message | Shift + F4 |
Category Online | |||
Force Values | F7 | ||
| Login | Alt + F8 | |
| Logout | Ctrl + F8 | |
Single Cycle | Ctrl + F5 | ||
| Start | F5 | |
| Stop | Shift + F8 | |
Unforce Values [active application] | Alt + F7 | ||
Write Values [active application] | Ctrl + F7 |


Category Browse Project | |||
| Go to Definition | Ctrl + Shift + D | |
| Display Cross References | Ctrl + Shift + X |


Category Undo/Redo | |||
| Undo | Ctrl + Z | |
| Restore | Ctrl + Y |


Category Find/Replace | |||
| Replace | Ctrl + H | |
| Replace in Project | Ctrl + Shift + H | |
| Find | Ctrl + F | |
| Find in Project | Ctrl + Shift + F | |
| Find Previous | Shift + F3 | |
Find Previous (Selected) | Ctrl + Shift + F3 | ||
| Find Next | F3 | |
Find Next (Selected) | Ctrl + F3 |


Category Text Editor | |||
Toggle Field for Incremental Search | Ctrl + Shift + I | ||
Make Lowercase | Ctrl + U | ||
Make Uppercase | Ctrl + Shift + U | ||
Overwrite Mode | Ins | ||
| Comment out selected lines | Ctrl + O | |
| Uncomment selected lines | Ctrl + I |


Category Build | |||
| Generate Code | F11 |

Category Clipboard | |||
| Copy | Ctrl + Ins | |
| Cut | Ctrl + X | |
| Delete | Del | |
| Insert | Ctrl + V | |
Select All | Ctrl + A |


Shortcuts in the ST Editor
Key Combination | ||
|---|---|---|
Shift + Alt + → | Extends the rectangle selection of the IEC code to the right. Hint: Use the rectangle selection to change the indentation of the code. |  |
Shift + Alt + ← | Extends the rectangle selection of the IEC code to the left | |
Shift + Alt + ↑ | Extends the rectangle selection of the IEC code up | |
Shift + Alt + ↓ | Extends the rectangle selection of the IEC code down | |
Shift + → | Extends the selection by one character to the right | |
Shift + ← | Extends the selection by one character to the left | |
Shift + ↑ | Extends the selection by one line up | |
Shift + ↓ | Extends the selection by one line down | |
Shift + roll mouse wheel | Scrolls the IEC codes along the scroll bar A scroll bar is automatically provided if the code can no longer be displayed in the window. | |
Ctrl + roll mouse wheel | Zooms in and out of the IEC code | |
Ctrl + Shift + i | Opens the dialog for the incremental search for strings Specify a string. This string is used for filtering. All matches are highlighted. | 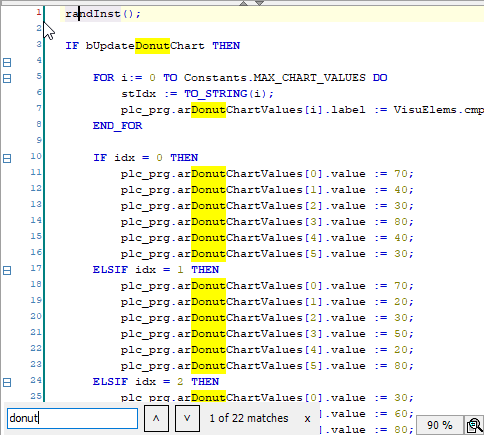 |
Alt + Page Up Alt + Page Down | Jumps to the next highlighted match in the IEC code The shortcuts are active only when the dialog for the incremental search is open. |
Shortcuts for Variable Declaration
In the textual declaration editor, you can use shortcuts where you declare variables to save from typing.
Specify the short form in a line of code and complete the action by pressing Ctrl + Enter. The line of code is then automatically completed. You can shorten the specification of the scope and you can shorten the variable declaration.
For more information, see section "Short form feature": Using Input Assistance
Short scope | After pressing Ctrl + Enter, completed to |
|---|---|
|
|
|
|
|
|
|
|
|
|
<short declaration> + Ctrl + Enter | The short declaration is supplemented to a complete variable declaration with indentation, final semicolon, and comment. In a line of code, first specify a variable name and, after a space the abbreviations for data type, address, initialization, and comment (all optional). Complete the entry by pressing Ctrl + Enter. The abbreviated entry is then added. |
<variable name> | Options for the short declaration |
<variable name> | Specify at least one variable name. You can also specify multiple variable names separated by spaces. The comma is added automatically. |
| Optional The short address is supplemented by an AT declaration. |
<short form for data type> | Optional The default data type is Possible short forms with full syntax in brackets
|
<initialization> | Optional Specify a literal which matches the data type. The option is supplemented to
|
| Optional |
Short declaration | After pressing Ctrl + Enter, completed to |
|---|---|
|
|
|
|
|
|
|
|
|
|
|
|
|
|
|
|
|
|
|
|
|
|
|
|
Windows™ shortcuts
Windows™ keyboard shortcuts are generally supported by CODESYS.
Use the following keyboard shortcuts to navigate in the following: Devices view, POUs view, Library Manager (in the contents), task configuration, Input Assistant, cross reference list, Visualization Toolbox view, properties, visualization tags view, trend recording, trace configuration, or repositories.
Objects in the views listed above are marked with the  symbol when there are more objects below them. The view can be expanded at this point. Objects are marked with the
  symbol when there are no more objects below them. The view is fully expanded.
Keyboard Area | Key | Procedure | Effect |
|---|---|---|---|
Numeric keypad | * | In the tree view, select an entry marked with the | Everything which is located below the selected object or folder in a tree view is expanded. |
Numeric keypad Arrow keys | + → | In the tree view, select an entry marked with the | The node is marked with the The object or folder is expanded. |
Numeric keypad | - | In the tree view, select an entry marked with the | The folder or element is collapsed. |
Numeric keypad Arrow keys | / ← | In the tree view, select an entry marked with the | Everything below the selected object or folder is collapsed. |
Arrow keys | ↓ | In the tree view, select a node. Then press the ↓ key. | The selection moves down. |
Arrow keys | ↑ | In the tree view, select a node. Then press the ↑ key. | The selection moves up. |
Tip
Make sure that the numeric keypad is enabled when you use shortcuts with keys on the numeric keypad.
Keyboard Area | Shortcut | Effect |
|---|---|---|
Numeric keypad (numpad) | Ctrl + + | Zoom in |
Numeric keypad (numpad) | Ctrl + - | Zoom out |