Dialog: Options: Visualization
Symbol: 
Function: Configures the visualization editor and the integrated visualization
Call: Tools → Options menu, Visualization category
Tab: General
Note
These settings are not applied used for the following display variants: CODESYS TargetVisu, CODESYS WebVisu, or CODESYS HMI.
Presentation Options (Visualization Editor in the Programming System) | |
Fixed | The visualization retains its original size. |
Isotropic | The visualization retains its proportions. |
Anisotropic | The visualization resizes to the window in the development system. |
Use scaling options for dialogs |
|
Antialiased drawing |
TipIf a horizontal or vertical line is drawn blurry on a specific visualization platform, then this can be corrected by an offset of 0.5 px in the direction of the line thickness (see element Absolute movement property, Use REAL values option). Requirement: The platform in use supports REAL coordinates. |
Device Image | If a “device image” (DeviceImage) is defined in the device description of the controller or in the Advanced Settings of the Visualization Manager, then it can be displayed in the visualization editor. Show offline: Show in visualizations with parameter interface: Show online: |
Editing Options | |
Link to toggle/tap variable where appropriate |
When you drag an element that has the Color variables and Toggle color properties into the visualization editor, then this property is configured with the <toggle/tap variable> placeholder. The following elements are affected: Button, Frame, Image, Line, Pie, Polygon, Rectangle, Text Field, Scroll Bar. |

Tab: Grid/Snapline
Assisted positioning | The Snaplines option is selected (default). In the editor, when inserting and moving elements, lines are shown which indicate where positions exist that match the positions of adjacent elements. In addition, lines are shown which subdivide the visualization editor into a grid. This allows you to align elements with adjacent elements or arrange them in a fixed column and row layout. |
Snapping sensitivity | Distance in pixels from which snapping to the snapline takes effect
|
Element distance | Minimum distance to adjacent elements
|
Border distance | Minimum distance from the border which is observed from the snapline
|
"Grid" lines | Hidden grid to support positioning in a fixed row and column layout The lines of the adjacent column or adjacent row are shown only when the element is moved with the mouse. |
Columns | Number of columns (all the same width)
|
Rows | Number of rows (all the same width)
|
Snap only on matching edges |
 |
Assisted positioning | The No assistance option is selected. In the editor, you can freely position a visualization element. |
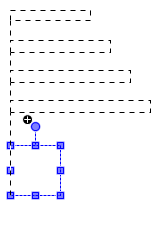
Assisted positioning | The Grid option is selected. A grid of points is displayed in the editor. You can move an element along the grid. |
Enabled |
|
| |
Size | Horizontal and vertical distance to the grid points (in pixels)
|

For more information, see: Assisted Positioning
Tab: File Options
Text file for textual "List components" | File name and location of a The file entries are provided when the "List components" feature is used as input assistance. Note: You create this file as an export file of the global text list by means of the Import/Export Text Lists command. |
Visualization Directories | |
Text list files | Locations for Text Lists. Note: This setting is valid in the project as long as no other location is configured in the Project Settings, Visualization category, Text list files field. Note: The location can also be defined by an environment variable. |
Image files | Directory with image files that are available in the project. Multiple directories are separated by a semicolon. CODESYS uses the directory for image pools with image files that are not integrated in the project, but referenced by a link. Absolute paths are used for global images throughout the entire project. Relative paths (example: This option allows for image pools to be opened successfully when the project and the respective image directory are moved to another directory on the computer. Note: This setting is valid in the project as long as no other location is configured in the Project Settings, Visualization category, "Image files" field. Note: The location can also be defined by an environment variable. |
Tab: Global Settings
Device Setting for Libraries and Global Visualizations | The following settings are used when the visualization is in the POUs view or when you are developing a library in a library project that is currently open. |
No limitation by device settings |
|
Use settings of the following device |
|
Currently selected device | Device whose device settings are used. |
Name | Example: CODESYS Control Win SL |
Version | Example: 3.5.11.0 |
Select Device | Opens the Select Device dialog. All installed devices are listed there. You can filter by device or vendor. Select a device and click OK to close the dialog. |
Derive device automatically | "Visualizations try to derive the device from current project".
|

Editing Settings for Library Visualizations | The setting affects visualizations in library projects and internal visualizations there. TipThis option is intended for library developers to also display the properties in a visualization that are relevant for the overlay feature and can therefore be edited. This is necessary here because library projects by definition do not require a device description or a Visualization Manager. |
Display overlay properties |
|
Update Frame Parameters Settings | For more information, see: |
Use Dialog for Update |
|
