Establish the Connection to the PLC
Starting the gateway server and PLC
Checking the options for accessing the controller
Controllers must never under any circumstances be accessible from the Internet or from untrusted networks. In particular, the programming ports of the controller must never be accessible from the Internet without security protection (mostly UDP ports 1740..1743 and TCP ports 1217 + 11740 or the controller-specific ports). If access from the Internet still has to be granted, then it is imperative that a secure method be selected to connect to the controller (example: VPN).
For more information, see also: Handling of Device User Management
Starting the gateway server:
By default, the GatewaySysTray program is also installed with CODESYS. You can use this program to communicate with the Gateway Server. The Gateway Server is started automatically as a service when the system starts. Check that the Windows taskbar contains the  program icon. When the gateway server is not running, the icon looks like this:
  . In this case, you can click the icon to open the gateway menu and click Start Gateway.
Starting the PLC:
By default, the CODESYS ControlSysTray program is also installed with CODESYS. You can use this program to communicate with the CODESYS Control Service. In CODESYS V3.5 SP2 and higher, the control service is no longer started automatically when the system starts. Start the PLC as follows: In the Windows taskbar, click  to open the PLC menu, and then click Start PLC. When the PLC is running, the icon changes to
  . A dialog that appears at startup indicates that the started PLC allows programming access. Pay attention to the security notice above.
In the very first communication configuration: Adding the gateway
In the Devices view, double-click the
Device (CODESYS Control Win)entry.The Communication Settings tab opens in the
Deviceeditor.
Tip
If this is your first communication configuration with CODESYS, then now you have to define the local gateway server. If you have already defined the gateway server, then it will be shown on the Communication Settings tab. In this case, you can now continue with the Defining the communication channel step.
The gateway server is provided with the CODESYS installation.
Click .
The Gateway dialog opens.

In the Name input field, specify a symbolic name for the gateway.
In the Drivers list box, select TCP/IP.
Double-click the right column of the IP address row and specify
localhostin the input field.Click the OK button.
The gateway is entered on the Communication Settings tab (1) of the device editor. When the gateway is running correctly, a filled green circle appears on the graphic of the gateway:

Defining the communication channel
Now define the communication channel to the device, which is then used via the set Gateway. To do this, double-click Device in the device tree to open the Communication Settings tab of the device editor.
Click Scan Network to search the local network for all available devices.
The Select Device dialog (1) appears with a list of all devices with which you can establish a connection.
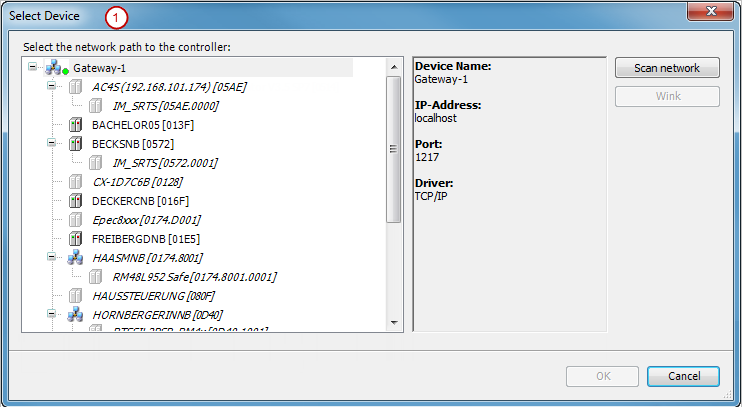
Select the tree entry with the name of your computer.
Click OK.
The channel is now active and the associated information appears below the device graphic on the Communication Settings tab.
Select the desired device and click OK.
A dialog prompt is displayed with the notice that a user management is required for the device, but it is not enabled yet. You are prompted to enable the user management if you want. The notice is displayed that in this case you have to create a new administrator account and then log in as this user.
Click Yes to close the dialog prompt.
The Add Device User dialog opens to create an initial device administrator.
Define the credentials (Name and Password) for the device administrator. Select the Password can be changed by the user option. Click OK to close the dialog.
The Device User Logon dialog opens.
Specify the credentials for the device administrator which you defined in the previous step.
The connection path for the PLC is set.
Tip
All communication actions now refer exactly to this channel. Remember this later when you have multiple communication channels in the project.