Creating a Template for the Deployment of the Application to PLCs
With the help of a template for an application and the commissioning ticket, a service technician can deploy the application on suitable PLCs in the specified gateway. The service technician deploys the application on PLCs that have not been registered yet on the CODESYS Automation Server.
You are signed in to the CODESYS Automation Server.
The application for which a template will be created has already been uploaded to the CODESYS Automation Server.
A service technician has been added to the CODESYS Automation Server.
In the CODESYS Automation Server, open the view.
All projects of the CODESYS Automation Server are shown.
At the project that contains the application, click the
 button and then click the application.
The Application view opens.
Click Create as Template.
The Template Structure for Application ID: <no> view opens.
Here you can change the displayed names so that they are unique.
Template name: Name of the template
PLC role name: Name of the PLC that should be shown on the CODESYS Automation Server in after commissioning the PLC
Application role name: For example, the name for the application or function of the application
Click Add Template Structure.
The message confirms that the template structure has been added.
Open the view.
The template that has just been created is displayed.
Click the
 symbol for the template and then click Details.
The following view opens:
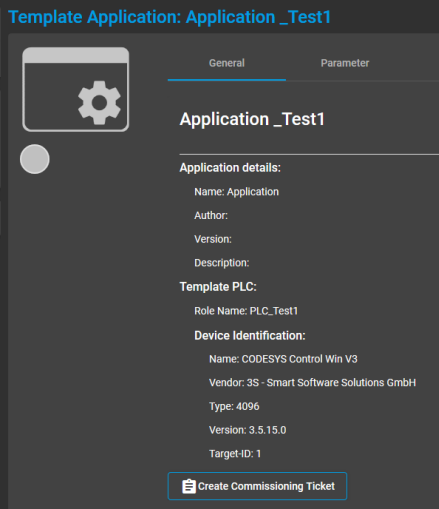
Click Create Commissioning Ticket.
The Create Commissioning Ticket view opens and shows the information about the commissioning ticket.
In this view, you can also select a registered service technician.
Select the gateway where the PLC will be searched for during commissioning.
Click Create Ticket.
The commissioning ticket is created.
Open the view.
The ticket that has just been created is displayed.
With this ticket, the application can now be deployed to a desired PLC.
Click the
 button to print out the ticket.
You can also send the ticket to the service technician selected in Step 8. To do this, click the
 button. In the Send Email dialog, click Send Email to send the ticket.
Now the ticket is available to you or the service technician.
Scan the QR code of the ticket with a smartphone or tablet, or click the ticket link.
The Commission App <application name> dialog opens.
Type in the serial number of the new PLC and a Feedback, meaning a message to the CODESYS Automation Server. Then click Commissioning this PLC.
After commissioning, this PLC is displayed on the CODESYS Automation Server in as the name that you specified in Step 4 as PLC role name.
For more information, see: Template Applications