Linking and Using an HTML5 Control
You can install an HTML5 control directly into your visualization element repository.
HTML5 controls can be added to a repository so that it is possible to distribute a project with all of the necessary contents.
Tip
HTML5 controls are often delivered as a package. The initial installation is then performed in the Package Manager.
Click Tools → Visualization Element Repository.
The Visual Element Repository dialog opens.
Select the HTML5 Controls option.
The Installed Elements list provides information about HTML5 controls which are already installed.
Click the Install command.
In the file selection dialog which opens, select the desired description file of the HTML5 control (
*.html5control.xml).If the description file is valid, then the element is automatically installed into the repository. In the visualization, the control is listed in Installed Elements. You can use it.
If the description file is invalid, then an error is issued. Then you need to contact the author of the element.
For more information, see: Command: Visualization Element Repository
The
 HTML5 Control Editor is located in the installation folder of CODESYS in the Windows Start Menu.
Open the editor.
The file selection dialog opens first. Select the desired description file of the HTML5 control there (
*.html5control.xml).The data of the element is displayed in the
HTML5 Control Editor.Edit the element so that a valid description file is created:
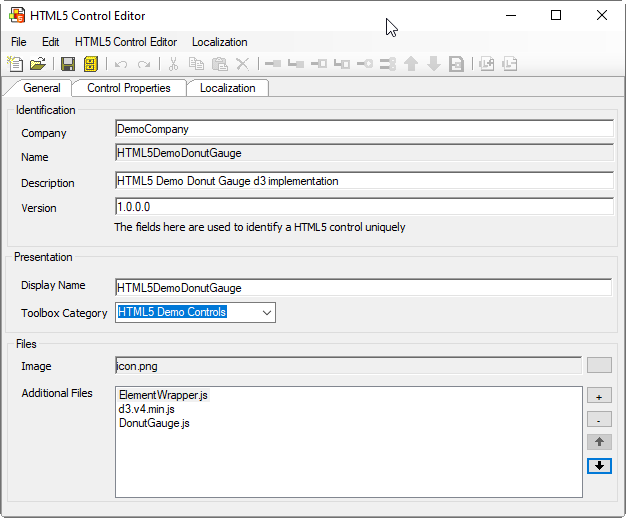
Configure the General tab:
Company:
Test GmbHName:
FirstControlImportant
The name must not contain spaces.
Toolbox Category: Special Controls
Optionally, specify an image file.
Note
If an image is not specified, then a default icon is used.
Specify a JavaScript file (JS) as the element wrapper. This is unconditionally required. This file wraps the calls from the CODESYS framework with the calls to the control itself.
If more files are required for the control, then these must also be specified here. These can be CSS files or JS files.
Important
You need to provide the wrapper file.
Make sure that the
ElementWrapper.jsfile is at the top and that the other files required for execution are below it.Example
Optionally, on the Control Properties tab, configure the element interface.
Optionally, on the Localization tab, configure the translations for the user interface texts of the control.
Click
 Save and Install.
Your settings are applied and their validity checked. Then the description file is saved and the control is installed in the repository.
In the visualization element repository, the control is listed in Installed Elements.
Open your CODESYS project.
Open a visualization object.
The recently installed control is available in the Visualization Toolbox view in the category which was specified in the description file.
Drag the control to the visualization editor and select it.
The element interface is available in the Properties view as defined in the
HTML5 Control Editor.
Example
HTML5DemoDonutGauge