Tutorial: Using Client Animation
The example shows a visualization with three screens. A menu controls the navigation of the screens. The menu is hidden until it moves into view by means of a hamburger button. During the movement, the transparency of the menu is changed. After the screen is selected, the menu moves back out of view. The animation is computed entirely on the target system. The CODESYS visualization only defines the target values (positions, transparency).
Preparation
Create a new standard project with the CODESYS Control Win controller.
Add a Visualization object below the Application. Choose the name
Visu_Main.Open the Visualization Manager in the editor and select the Support client animations and overlay of native elements option.
For more information, see the following: Settings
Creating the PLC_PRG program
The program checks whether the menu button has been pressed. If the menu bar is not visible (position –300), then the position is moved to the visible area (0). If the menu bar is already visible (position 0), then the position is moved to the hidden area.
Open the
PLC_PRGprogram in the editor.Input the following code into the declaration editor:
PROGRAM PLC_PRG
VAR
    iSelection : INT; // to switch the referenced visualization page
    xVisible: BOOL; // auxiliary variable to toggle the menu bar
    iMenuPos : INT := -300; // position of the menu bar
    xToggle: BOOL; // button variable to toggle the menu bar
END_VAR
Input the following code into the implementation:
IF xToggle THEN
    xToggle := FALSE;
    IF xVisible THEN
        xVisible := FALSE;
        iMenuPos := -300;
    ELSE
        xVisible := TRUE;
        iMenuPos := 0;
    END_IF
END_IF
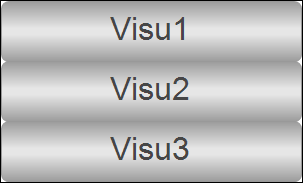
Creating a menu bar
The menu bar has three menu items. A visualization screen is displayed by clicking the corresponding menu item.
Insert a Visu_Menu visualization below the application.
Open the object properties. In the Visualization tab, set the Visualization size to a Width of 300 and a Height of 180.
Open the visualization in the editor.
Select the Advanced option in the Properties view.
In the upper left corner, add a button with a Width of 300 and a Height of 60.
Label the button as "Visu 1". Set the font size to 24.
Open the Input configuration →
OnMouseClickproperty.Select the Execute ST code action.
Input the following ST code:
PLC_PRG.iSelection := 0;
PLC_PRG.xToggle := TRUE;
Set the property to
PLC_PRG.iSelection=0.Add two more buttons named
Visu 2andVisu 3.Edit the button properties of
Visu2(PLC_PRG.iSelection = 1) andVisu3(PLC_PRG.iSelection = 2).Result:
Create more visualization pages
Insert the
Visu1visualization below the application.Open the object properties. In the Visualization tab, set the Visualization size to a Width of 800 and a Height of 600.
Change the background color of the screen (for example, light gray).
Insert a Label object into the visualization screen and name the element (for example with
Visu 1).Insert two more visualizations
Visu2andVisu3below the application. Edit the properties in the same way as forVisu1.
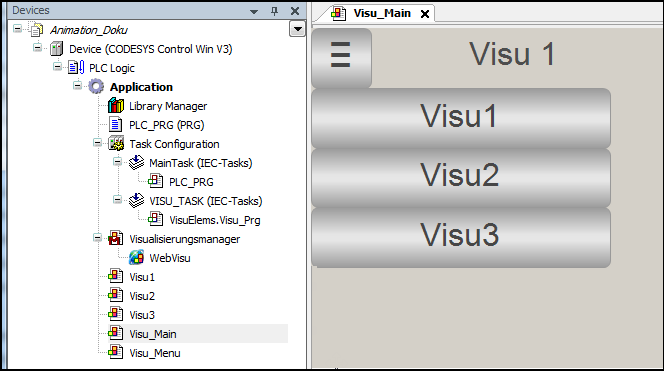
Create the main visualization page
On this screen, you can see the menu bar and a button to show or hide the menu bar. The different visualization screens are navigated in a Frame visualization element.
Open the properties of the Visu_Main visualization. In the Visualization tab, set the Visualization size to a Width of 800 and a Height of 600.
Open the visualization in the editor.
Insert a Frame element into the visualization.
The Frame Configuration dialot opens.
Add the
Visu1(Index 0),Visu2(Index 1), andVisu3(Index 2) visualizations.Set the property values of Position as follows: X =
0, Y =0, Width =800, and Height =600.Set the value of the Switch frame variable → Variable property to
PLC_PRG.iSelection.Insert a Button element into the visualization.
Set the property values of Position as follows: X =
0, Y =0, Width =800, and Height =600.Set the value of the Texts→ Text property to
=.Set the value of the Text properties → Font property to
Arial; 36.Open the Input configuration →
OnMouseClickproperty.Select the Execute ST code action.
Input the following ST code:
PLC_PRG.xToggle := TRUE;
Set the value of the Button state variable → Digital variable property to
PLC_PRG.xVisible.Insert the Visu_Menu visualization element from the Current Project category into the visualization.
Set the property values of Position as follows: X =
0, Y =0, Width =300, and Height =180.Set the value of the Absolute movement → Movement → X property to
PLC_PRG.iMenuPos.Set the value of the State variables → Invisible property to
not(PLC_PRG.xVisible).Set the property value of Animation duration to
2000.Result:
Downloading the project to the controller and starting the WebVisu
Build the project and download it to the PLC.
Start the project.
In the browser, connect to the visualization (
http://localhost:8080).The WebVisu connects to the controller and the visualization opens.
In the visualization, click the menu button.
The menu moves into view.
Select a menu item.
The visualization screen is selected and the menu moves back out of view.