User Interface
Installing the CODESYS Test Manager package
Start the CODESYS Development System.
Click the Tools → CODESYS Installer command.
The CODESYS Installer will open.
Select the current version of CODESYS Test Manager.
The package is installed.
Restart your CODESYS installation.
Click the Tools → Test Manager command.
The user interface of the Test Manager will open.
The Test Manager view is displayed. The default test repository is selected there. The view contains buttons for managing test repositories and test reports. Below that is the Test Scripts tab. There you can navigate through the installed test repositories and the test scripts stored in them.
The test script editor is located to the right of the view. It shows the test script selected on Test Scripts. To the right of that is the editor of the test elements. It shows the test element selected in the test script in detail, and you can then configure it.
User interface of the Test Manager
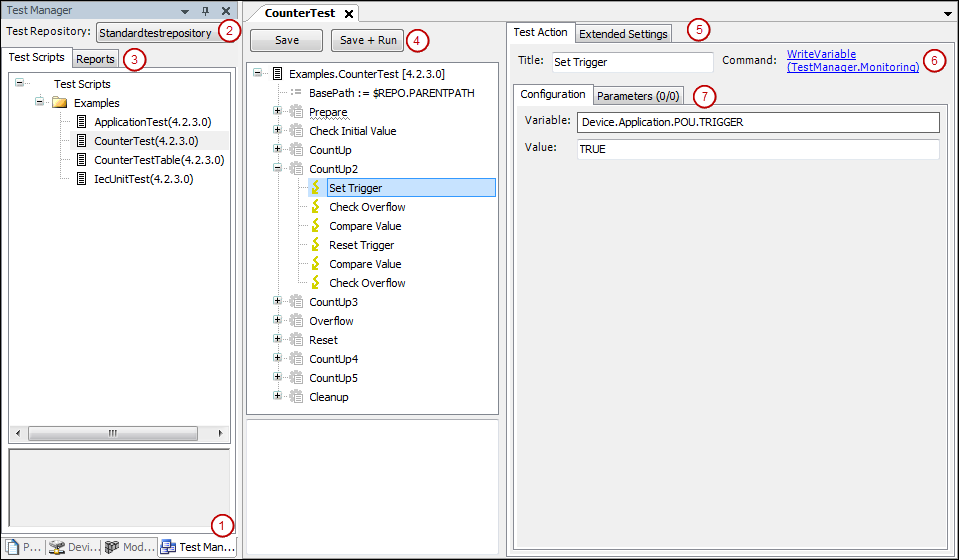
Test Manager view
In the view, you have access to all known test repositories. The Manage Test Repositories and Manage Test Reports buttons open the dialogs of the same name.
Test Scripts
The tab shows the known test repositories with their location. The folders and test scripts are listed with their version below each test repository. Double-click a test script to open it in the test script editor.
Test script editor
The editor shows the open test script as a flow tree. A test script consists of elements such as assignments, test cases, and test actions. You use the toolbar to save and execute the test script.
Test element configurator
Here you configure the test element which is selected in the test script editor. For a test action such as
UpdateDevice, these are the Test Action and Extended Settings tabs.