Working with the Simulation Interface
Preparations
When getting started with the simulation interface, it is helpful to configure the local environment with two CODESYS controllers.
Tip
The easiest way to do this is to download the two CODESYS Control Win SL controllers from CODESYS Store International. You will find the product and the data sheet for the product in the CODESYS Store International or in the CODESYS Store North America. The ZIP file contains the 64-bit and 32-bit version of CODESYS Control Win SL.
Installing the packages
Install the CODESYS Simulation Interface add-on in your CODESYS programming tool.
Install the CODESYS Simulation Interface Example package.
The CODESYS Simulation Demonstrator add-on is part of the package.
Install and open the
SimulationInterfaceExample.projectarchivesample project.
Install the two runtime systems.
Open a standard project with a CODESYS Control Win 32-bit device. Start the gateway and the device.
In the Devices view, double-click this device.
The device editor opens.
Click the Scan Network button.
The CODESYS Control Win 32-bit runtime environment is displayed.
Select the device and configure it as usual.
The device is connected.
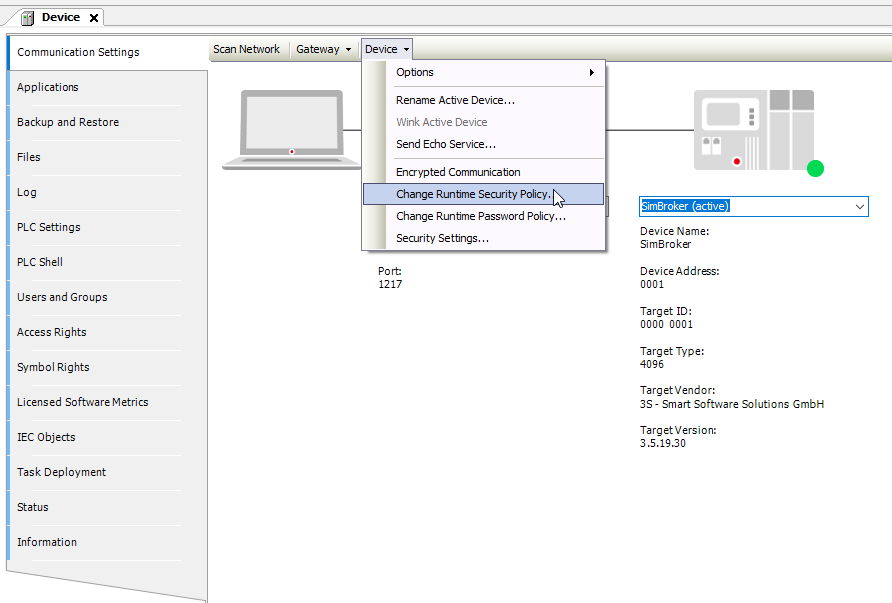
Select the command Change Runtime Security Policy and click Yes to confirm the next dialog.
Communication settings
Configure the device user management.
In the Change Runtime Security Policy dialog, set the device user management from Enforced user management to Optional user management.
Enable the Allow anonymous login option and click OK to confirm the settings.
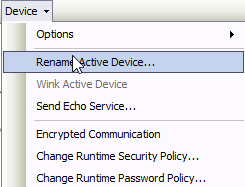
Click the Device button and select the Rename Active Device command and rename the active device in the next dialog.
Specify a new device name (example:
SimBroker).Update the device to the device description
CODESYS Control Win x64.Repeat from Step 3, but rename the device as
SimTarget.Ready.
Simple example
To familiarize you with the simulation interface, a simple example is developed step by step. Imagine a machine whose I/O data is exchanged via a fieldbus. A PROFIBUS is used as the fieldbus.
Create a new standard project and select the 64-bit device CODESYS Control Win as the device type of the simulation target.
Double-click the device.
The device editor opens.
Configure the following:
Add an Ethernet adapter.
Add a PROFINET Controller.
Add an 8-bit input.
Add an 8-bit output.
Declare two byte variables in
PLC_PRGand use the variables in your application code.byIn,byOutAssign the variables to an input and an output.
Generate the code.
In the best case, the build is executed without errors.
You now have the following device tree:
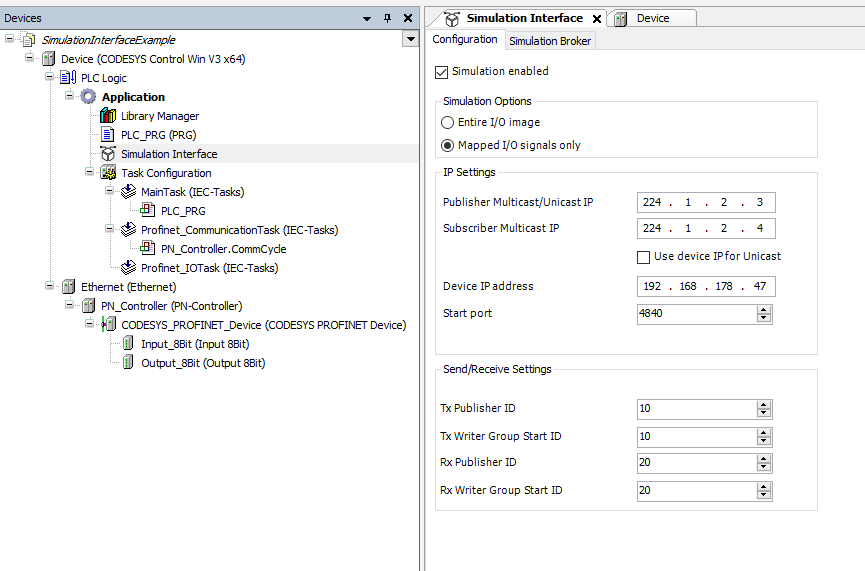
This is the application we want to simulate.
Use the following steps to add the simulation interface. You configure these to simulate the application.
Select the application and select the Add Object → Simulation Interface command in the context menu.
In the next dialog, click the Add command.
The simulation interface has been added and can now be configured.
For these first steps, leave the default values unchanged and only adjust the IP address of the device. Specify the local address (example: 192.168.178.47).
On the Configuration tab, set the Simulation Options setting to Mapped I/O signals only.
Select the Simulation enabled option.
Switch to the Simulation Broker tab.
Click the Select Broker Device button.
Select
Gateway-1and click the Scan Network button.The
SimBrokerandSimTargetdevices are displayed.Select the SimBroker device.
Click the Update Broker button.
Wait until the message Simulation broker successfully updated is displayed.
Log in to the
SimTargetdevice.
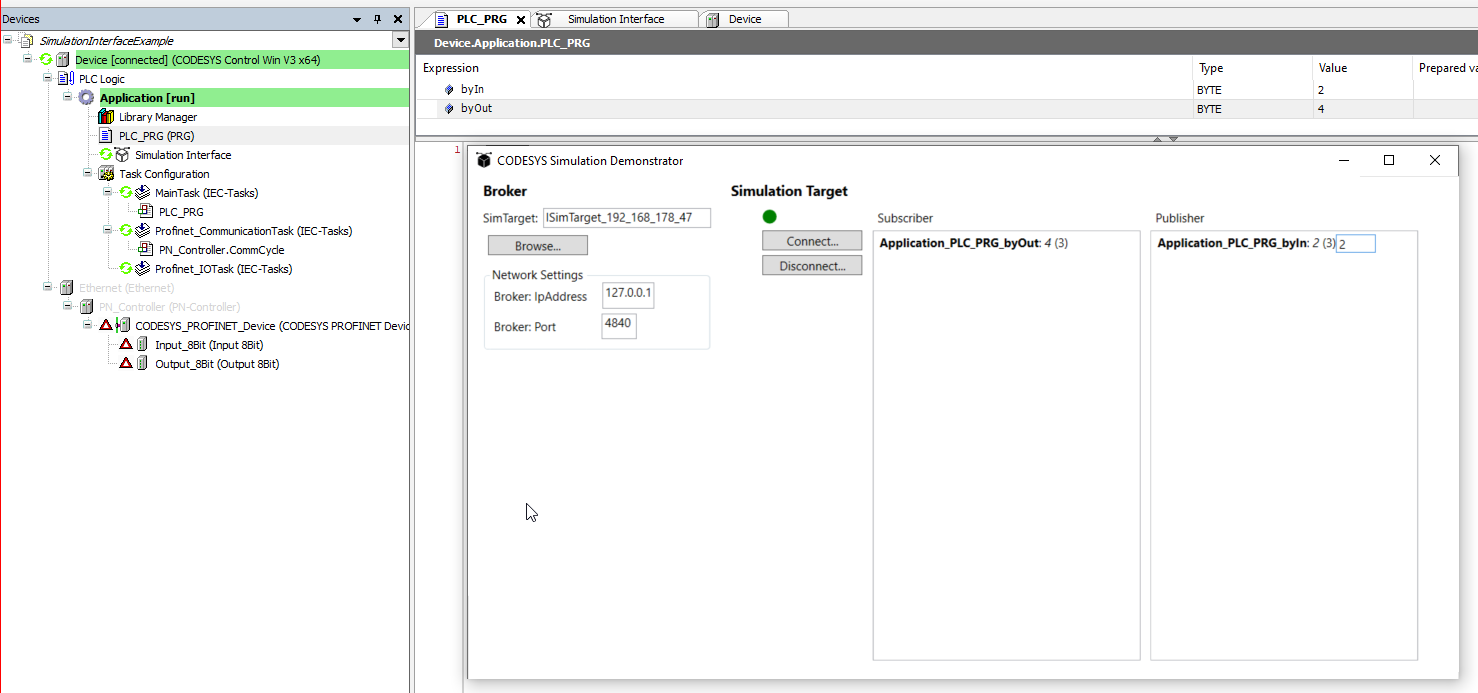
This information model can now also be scanned by the software to get information about the existing simulation targets and the information model used. The CODESYS Simulation Interface Example add-on demonstrates this. All you need to do is install and run the CODESYS Simulation Demonstrator.msi file.
Click the Browse button to search for the destination. It should appear as ISim_Target_xxx_xxx_xxx_xxx as you can see below. The following image also shows the use of the Simulation Interface object and the Simulation Demonstrator. The value Application_PLC_PRG_byOut was written by the publisher and the value Application_PLC_PRG_byIn was subscribed to by the simulation demonstrator via OPC UA PubSub.