Example: Using the Azure IoT Hub Client SL Library
Product: CODESYS IIOT Libraries SL
Description
The Azure IoT Hub Client SL Example.project sample project shows how to use of the library POUs of the Azure IoT Hub Client SL library.
It contains the AzureHTTPDemo and AzureMQTTDemo applications.
Set up the "Azure IoT Hub" and create devices in the "Azure IoT Hub".
For information about the "Azure IoT Hub", see:
Generate "Shared Access Signatures" (SaS tokens).
A device is authenticated via "Shared Access Signatures" (SaS tokens).
For access via MQTT, an SaS token based on the "device" policy is required.
Access via HTTPS requires an SaS token based on the "device" policy and an SaS token based on the "iothubowner" policy.
The SaS token can be generated via the Azure Cloud Shell (Azure Portal), via the "Azure IoT Explorer" tool, or directly via the
GenerateSasTokenlibrary function.The
GenerateSasTokenfunction takes 4 input parameters (URL address, Primary Key, Policy Name, Expiry) and returns an SaS token asWSTRING(255).Start the Cloud Shell from the Azure Portal.

Generate a
deviceSaS token:az iot hub generate-sas-token -d YOUR_DEVICE_ID -n YOUR_IOT_HUB --du DURATION_IN_SECONDS --policy deviceGenerate the
iothubownerSaS token:az iot hub generate-sas-token -n YOUR_IOT_HUB --du DURATION_IN_SECONDSFigure 10. Generated SaS tokens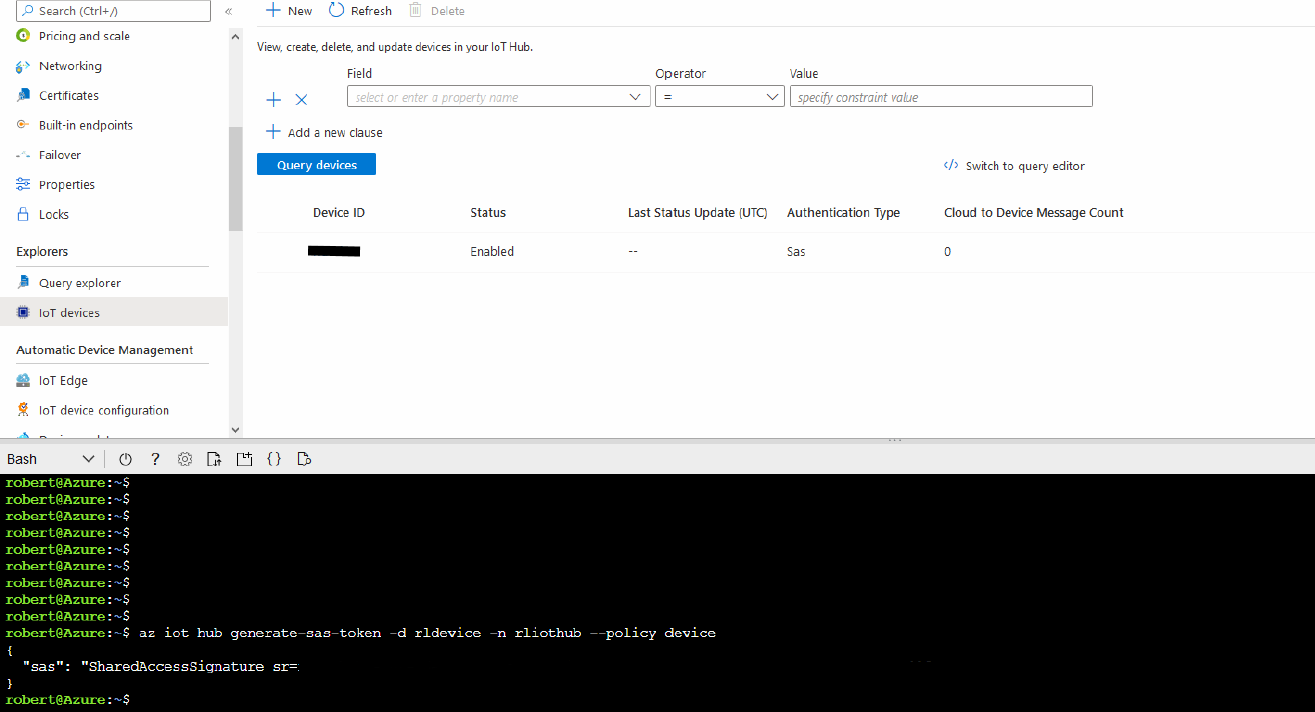
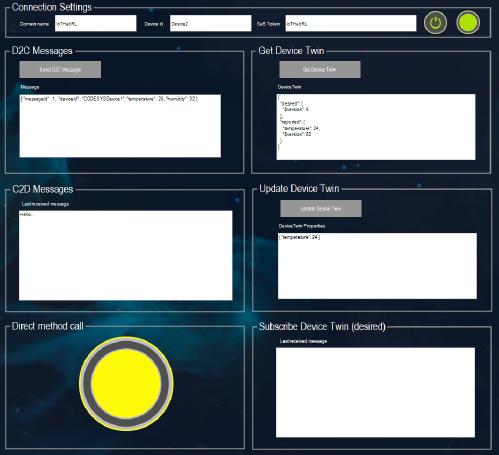
In the sample project, set the names of the IoT Hub, DeviceId, and SaS tokens:
sSubDomainName: Name of the "Azure IoT Hub" without "azure-devices.net" (see Step 1)sDeviceId: ID of the devicewsDeviceSaS: SaS token of the device (MQTT, HTTP) (see Step 2)wsIoTHubOwnerSaS: SaS token of the IoT Hub Owner (HTTP) (see Step 2)Download the project to the controller and start the applications.
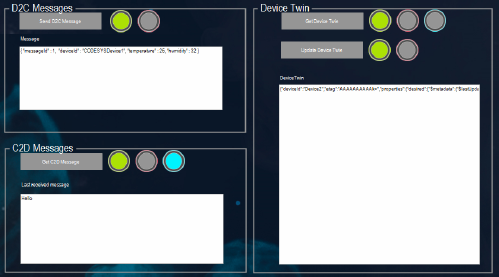
Start the
AzureHTTPDemoapplication.You can execute the following functions via the visualization:
Send D2C Message
Get C2D Message
Get Device Twin
Update Device Twin
Start the
AzureMQTTDemoapplication.You can execute the following functions via the visualization:
Establishing an MQTT connection
Send D2C Message
Get C2D Message
Get Device Twin
Update Device Twin
Method call: Direct method call
Subscribe Device Twin (desired)
You send and receive messages using the
Azure IoT Explorertool.The
Azure IoT Explorertool can be used to view and send messages. You can find the download link for it below.Figure 11. Azure IoT Explorer: Monitoring of D2C messages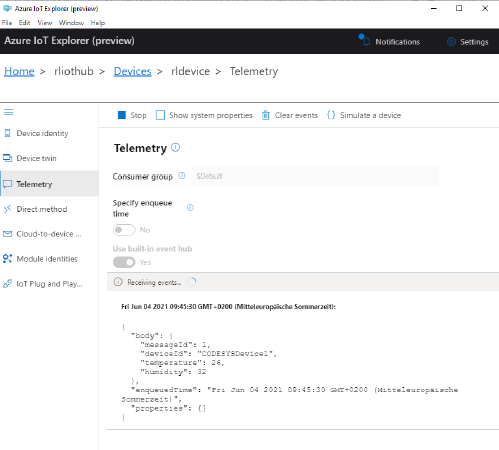 Figure 12. Azure IoT Explorer: Sending of D2C messages
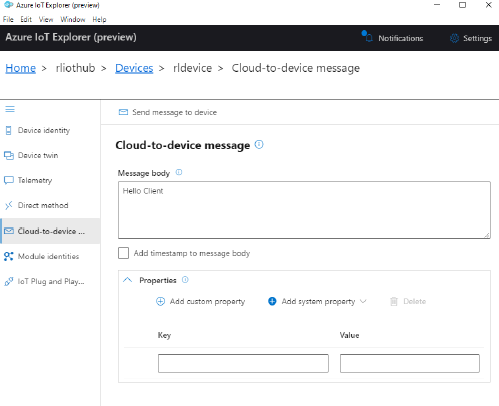 Figure 13. Azure IoT Explorer: Remote method call
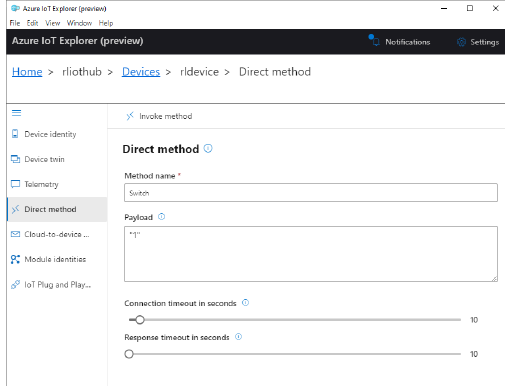
Additional information
For information about the "Azure IoT Hub", see:
"Azure IoT Explorer" tool:
Generates SaS tokens (only for the "device" policy)
For more information, see: azure-iot-explorer
For more information about "Cloud Shell" and "Azure CLI", see: az iot hub
Tip
In the Azure environment, messages are usually sent in JSON format. The CODESYS library JSON Utilities SL can be used for parsing and generating JSON files.
System requirements and restrictions
Programming system | CODESYS Development System (version 3.5.18.0 or higher) |
Runtime system | CODESYS Control Win (version 3.5.18.0 or higher) Note: Use the free |
Add-on components | - |
Additional requirements | Microsoft Azure account with Azure IoT Hub service, device explorer |
Note
 DOWNLOAD projects