Configuring the Camera Module
Saving camera images
Requirement: The Raspberry Pi Camera expansion hardware is connected and activated.
The Camera.project project contains an application which controls a Raspberry Pi Camera module, takes individual images, and saves them as a file.
Important
On some models, the pre-installed RPi Cam Control application has to be disabled. To do this, open a browser and specify http://<network address>. The configuration page opens. Execute the stop camera command there.
Open the
Camera.projectproject and update it.In the device tree, double-click Device.
The device editor opens.
In Communication Settings, click Scan Network.
If your Raspberry Pi and the development system are on the same network, then your Raspberry Pi is displayed for selection.
Select it and click .
The application is downloaded to your Raspberry Pi.
Start the program (press the F5 key).
Set the
xTakePicturevariable toTRUE.The camera takes a picture and saves it to the local file system under the name
Picture.jpg.
You can copy the image file in the device editor under Files to your development system. Click the  symbol to refresh the file view.
Visualizing camera images
The CameraStream.project project contains an application with a WebVisu user interface which displays a camera live stream or just a single image.
Requirement: The Raspberry Pi Camera expansion hardware is connected and activated.
Important
Depending on the version of RPi_Cam_Web_Interface and the included Apache installation, the default location may be ../var/www/ or ../var/www/html/. The location is used in the application in PLC_PRG on line 3 and you have to adjust it accordingly.
Open the
Camera.projectproject and update it.In the device tree, double-click Device.
The device editor opens.
In Communication Settings, click Scan Network.
If your Raspberry Pi and the development system are on the same network, then your Raspberry Pi is displayed for selection.
Select it and click .
The application is downloaded to your Raspberry Pi.
Start the program (press the F5 key).
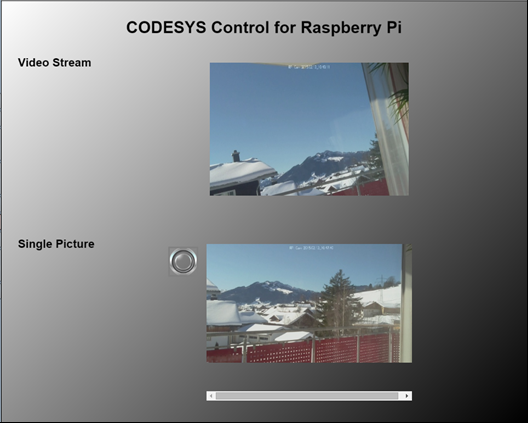
Open any browser (possibly on a smartphone) and specify the address
<network address>:8080/webvisu.htm.The user interface of the project opens. The top part shows the live stream of the camera and below it the last frame. When you click the button, the frame will be updated.