Installing the Operating System
In order to install CODESYS Control for <device> SL on your device or hardware, you need a Linux operating system.
Caution
Pay attention to the manufacturer-specific instructions.
Install the Linux operating system on the memory card of your device according to the description on the homepage of the manufacturer.
The operating system is installed on the memory card.
Start the device with the memory card.
The operating system is running and is ready to use.
Device-specific settings
If the BeagleBone is directly connected to your local system by a USB cable, then the default IP address is 192.168.7.2.
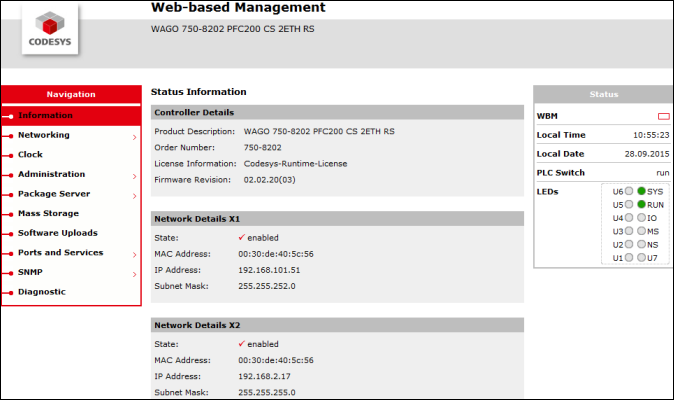
Make sure that the WAGO controller is powered up and connected to your network. The network cable which connects the controller to the CODESYS engineering platform has to be inserted into the X1 socket. The X2 socket is used for fieldbuses.
When using an Ethernet fieldbus, you need to set the Ethernet interfaces of the PFC100/200 to "Separated". Type in the IP address of the device into your browser.
The "Web-based Management" page for the device opens.
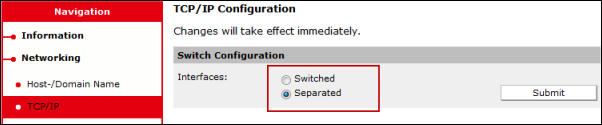
Click the Networking → TCP-IP menu command.
If you are prompted to provide user login data, then type in the user name
adminand passwordwago.In Switch Configuration, select the Separated option and click Submit to confirm.
Close the browser.
Changing the active partition is not yet possible in the current version of CODESYS Control for PFC100/200 (menu item: "Mass Storage").
The licensing information in the Information → Controller Details → License Information menu item refers to the preinstalled WAGO controller, not the CODESYS Control for PFC100/200.
The settings for the firewall (PLC Runtime and PLC WebVisu) also refer to the preinstalled WAGO controller, not the CODESYS Control for PFC100/200.
If the firewall should be configured for CODESYS Control for PFC100/200, then "user filters" can be used for manual configuration.
For Ethernet-based fieldbuses, the runtime automatically uses the second network interface ("X2" or "br1"). Settings in the Ethernet adapter and EtherCAT configurator for the used network interface are overwritten.
Configuring the Raspberry Pi
Execute the
sudo raspi-configcommand in a console or via SSH (for example, using thePuttytool).Note: As of Debian version 8 ("Jessie"), there is also a graphical configuration interface with the same settings.
The configuration tool starts.
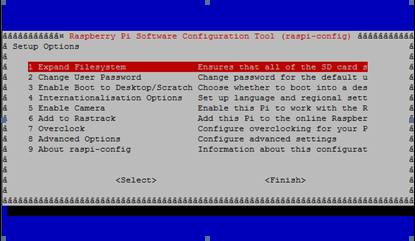
Select the
1 Expand Filesystemcommand.Optional:
Select the
8 Advanced Optionscommand and specify a unique name for the Raspberry Pi.Optional:
Select the
5 Enable Cameracommand.The camera is operational.
Exit the configuration tool and restart.
Activating the I²C, SPI, and 1-Wire peripheral interfaces
Edit the
/boot/config.txtfile with a text editor (for example, usingsudo nano /boot/config.txt). Pay attention to the permissions.Check your configuration and adjust it if necessary.
The following lines are included (and not commented out with
#):dtparam=i2c_arm=on dtparam=spi=on dtoverlay=w1-gpio-pullup,pullup=1
Note: I²C, SPI, and 1-Wire peripheral interfaces are optional.
Activating the camera
Execute the
sudo raspi-configcommand in a console or via SSH (for example, using thePuttytool).Select the
5 Enable Cameracommand.Execute the following commands:
sudo apt-get update
sudo apt-get dist-upgrade
sudo rpi-update
git clone https://github.com/silvanmelchior/RPi_Cam_Web_Interface.git
cd RPi_Cam_Web_Interface
chmod u+x RPi_Cam_Web_Interface_Installer.sh
./RPi_Cam_Web_Interface_Installer.sh install
Start a web browser and open
http://<network address>.If the installation is successful, then the RPi Cam Control user interface will load and you can use the camera.