Creating Initial HMI Projects
An wizard is available for the initial creation of an HMI project.
Initial situation: The controller to be displayed in a visualization is executed and connected to the controller network. The HMI device for which you program a new HMI application is also connected to the controller network.
Start the CODESYS Development System.
Click .
The New Project dialog opens.
Select the Projects category and the HMI project template. Specify a name and location.
Example:
HMI_Plant_SouthwestThe Create HMI Project – Choose HMI Device dialog opens. All installed HMI devices are listed there.
Select the appropriate device and start the PLC application on this device that you want displayed in a visualization.
Click Next.
The Create HMI Project – Connect to HMI Device dialog opens.
Click the Select Path by Network Scan button.
The Select Device dialog lists all active HMI devices in the controller network.
Note: Instead, you can specify the communication settings of your device directly.
Select your device and close the dialog.
In the Create HMI Project – Connect to HMI Device dialog, click the Next button.
The Create HMI Project – Add Objects dialog opens.
Activate the objects which you need for your HMI application (example: all).
The Create HMI Project – Choose Perspective dialog opens. The HMI perspective there is preset and you see a preview of the project organization in the new project.
Select the perspective that is most practical for your work. Changes are possible at any time.
Click the Exit button.
The
HMI_Plant_Southwestproject is created and opened in CODESYS.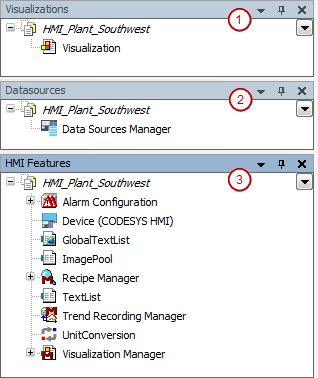
HMI Perspective:
(1): Visualizations view
(2): Data Sources view
(3): HMI Features view