Usage
Restriction
CODESYS EtherCAT version 4.10.0.0 contains a known issue with the function "Load PDO info from the device", which prevents it from working properly with the CODESYS SoftMotion Stäubli Support package.
Please use either an earlier or a newer version of CODESYS EtherCAT instead.
The following instructions describe the configuration of a Stäubli robot in the CODESYS Development System development environment.
Create a new standard project with your controller:
Select the implementation language of your choice.
Select a device description for your controller.
Add the EtherCAT drives:
In the device tree, open the context menu of the
Devicenode and select the Add Device command.The dialog opens.
Under Fieldbuses → EtherCAT → Master, select the fieldbus
EtherCAT Master SoftMotion. Click the Add Device command to confirm the selection, but leave the dialog open.The new node
EtherCAT_Master_SoftMotionis shown in the device tree.Click this node in the project tree.
The options change in the Add Device dialog.
Select your Stäubli robot. You can find it under Fieldbuses → EtherCAT → Slave → Staubli robotics. Click Add Device to confirm your selection and then close the dialog.
Under the
EtherCAT_Master_SoftMotionnode, another node for the robot has been created with more nodes for its drives.
Enable the expert settings of the EtherCAT node for the robot:
In the device tree, under the
EtherCAT_Master_SoftMotionnode, double-click the robot.The editor opens.
Enable the Expert settings option there.
For more information, see the following: Tab: EtherCAT Slave – General
Check that I/Os have already been configured on your Stäubli CS 9 Controller.
If no I/Os are configured, then you need to disable the product ID check for the robot.
The Stäubli CS9 Controller has a different product ID when configured without I/Os than when configured with I/Os.
In the device tree, under the
EtherCAT_Master_SoftMotionnode, double-click the robot node.The editor opens.
In the Startup Checking group, disable the Check product ID option.
The following configuration was used on a
ts2_100_S1_D25_L200_ceiling_R4robot.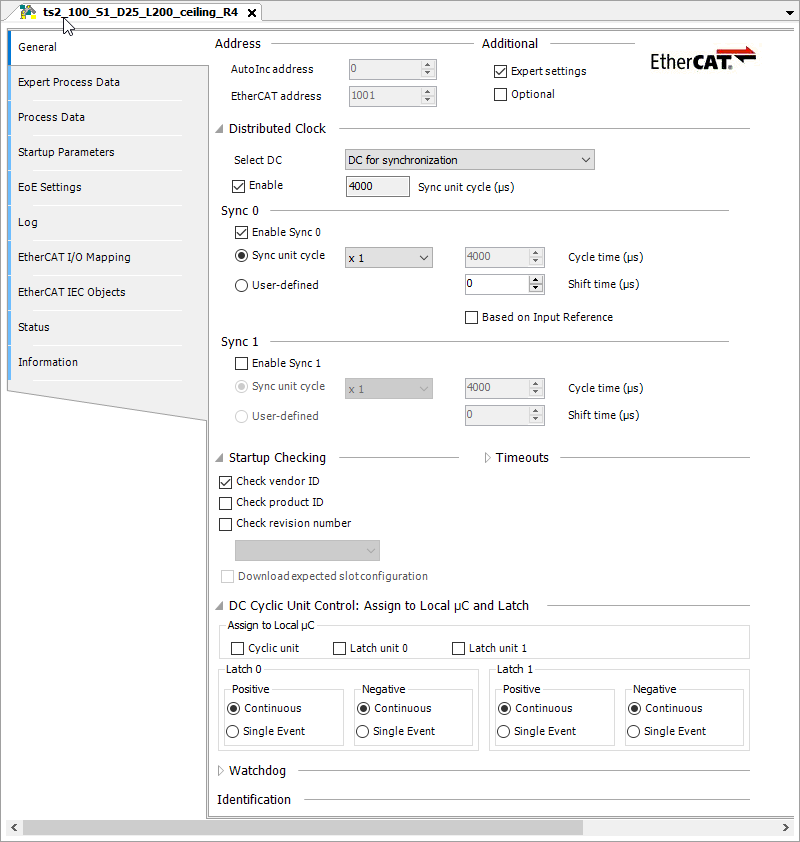
If I/Os have already been configured, then nothing else needs to be done. Go to the next step.
Transfer the PDO configuration to the project:
Under the
EtherCAT_Master_SoftMotionnode, open the editor of the robot.Open the Expert Process Data tab and disable the PDO configuration option in the Download group.
The following configuration was used on a
ts2_100_S1_D25_L200_ceiling_R4robot.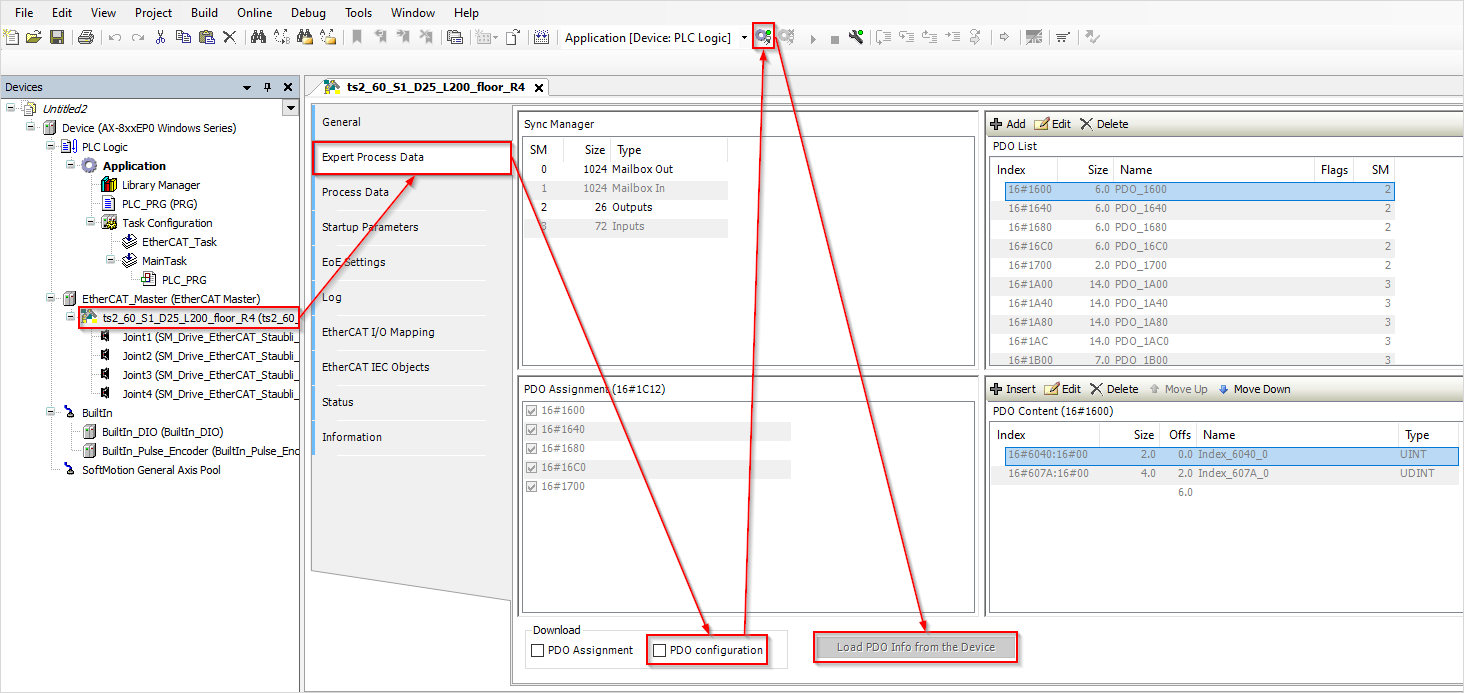
Log in to the controller, start the application, and wait until the EtherCAT thread has booted.
Now click the Load PDO Info from the Device button.
The PDO configuration of the robot will be applied to the project.
Log out of the controller.
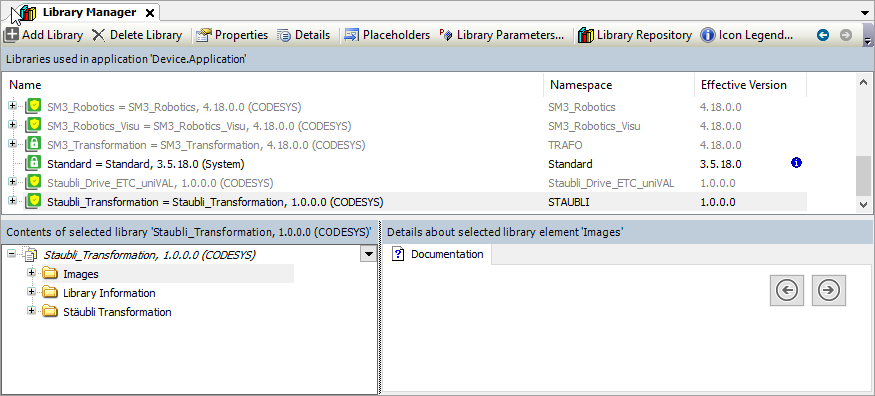
Add the
Staubli_Transformationlibrary to the project.Open the Library Manager of the project.
On the top left, click the Add Library button.
The dialog opens.
In the search bar, enter the text "Staubli_Transformation" and add the library which you have found.
Insert an axis group.
In the device tree, select the
Applicationnode and open the context menu. Click the Add Object → Axis Group command.The Add Axis Group dialog opens.
Enter a name of your choice and click the Add button to confirm.
An axis group is inserted below the application. The axis group configurator opens.
Click the Select kinematics button.
The Select kinematics dialog opens with a list of all available kinematic configurations and their descriptions.
Select your robot type from this list.
In the Mapping to Axes parameter group, map the axes to the drives added in Step 2.
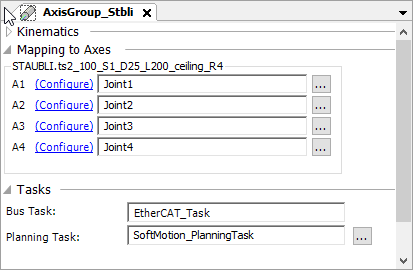
Important
For the drives of the Stäubli robot, some input fields are deliberately hidden. These are already preconfigured. These include, for example, the input fields for dynamic limits of an axis or its scaling.